BACK
BACK A Comprehensive Guide to Installing a WPC Terrace.
5 december 2023
Introduction
A well-designed terrace can be a stunning extension of your living space, providing a relaxing outdoor area for leisure, entertainment, and enjoying nature. In recent years, Wood-Plastic Composite (WPC) has gained popularity as an excellent material choice for terrace installations due to its durability, aesthetics, and low maintenance requirements. In this blog post, we'll take you through a step-by-step guide to installing a WPC terrace, ensuring that you create a beautiful and functional outdoor space to enjoy for years to come.
Step 1: Planning and Design
-
Assess Your Space:
Begin by evaluating the available space for your terrace. Consider the dimensions, layout, and any existing features that might influence the design
-
Create a Design:
Sketch out your terrace design, incorporating elements like seating areas, planters, and pathways. Take into account the flow of traffic, the direction of sunlight, and any privacy considerations.
- Choose WPC Materials
Select the type of WPC decking and components you'll need. These can include decking boards, joists, railings, and accessories. Choose a color and texture that complements your overall design scheme.
Step 2: Preparation and Foundation
-
Clear the Area:
Remove any vegetation, debris, or obstacles from the installation area.
- Prepare the Foundation:
Depending on your existing ground conditions, you may need to prepare a stable and level foundation. This can involve digging, leveling, and compacting the soil.
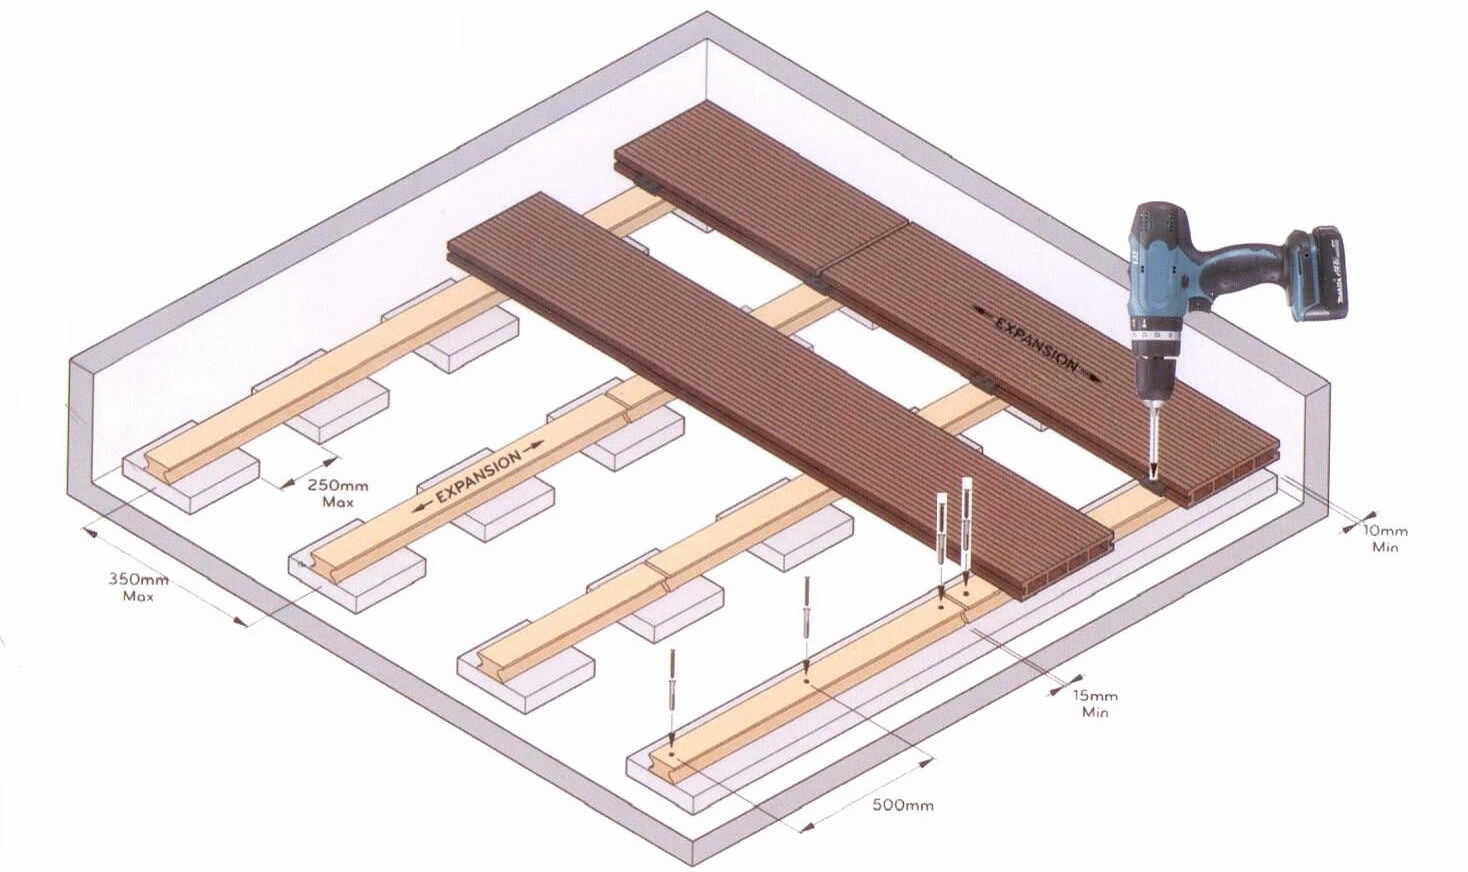
- Install Joists:
Lay down the joist framework, which will provide the support structure for the WPC decking boards. Make sure the joists are evenly spaced and securely anchored.
Step 3: Installing the WPC Decking
- Start with a Solid Base:
Begin installing the WPC decking boards at one end of the terrace area. Ensure that the first board is properly aligned and secured to the joists.
- Use Proper Spacing:
Leave a small gap between each board to allow for natural expansion and contraction due to temperature changes. WPC boards typically come with guidelines for appropriate spacing.
- Secure the Boards:
Use appropriate fasteners to secure the decking boards to the joists. Make sure the boards are level and aligned as you work your way across the terrace.
- Trimming and Finishing:
At the edges of the terrace, you may need to trim the WPC boards to fit the space. Use a saw or appropriate cutting tool to achieve clean and precise cuts.
Step 4: Adding Railings and Accessories
-
Install Railings:
If your terrace design includes railings, follow the manufacturer's instructions to install them securely. Railings not only provide safety but also add to the aesthetic appeal of the space.
-
Accessories and Finishing Touches:
Add accessories such as planters, outdoor furniture, lighting, and any other decorative elements that will enhance the functionality and ambiance of your terrace.
Step 5: Maintenance and Care
- Regular Cleaning:
While WPC is low maintenance, regular cleaning will keep your terrace looking its best. Use a mild detergent and a soft brush to remove dirt and debris.
- Address Stains Promptly:
Address any spills or stains as soon as possible to prevent them from setting into the material.
-
Inspect Regularly:
Periodically check for loose boards, fasteners, or any signs of wear and tear. Address any issues promptly to ensure the longevity of your terrace.
Installing a WPC terrace can transform your outdoor space into a functional and inviting area for relaxation and entertainment. By following this comprehensive guide, you'll be well-prepared to plan, design, and execute a successful WPC terrace installation. Remember, careful planning, proper installation techniques, and regular maintenance will ensure that your terrace remains a beautiful and enjoyable extension of your home for years to come.